Saturday, October 3, 2015

Projector Photography

photography and layout by me. model: bea adams

TIPS

  1. To achieve a black background, place the projector on an angle. Then, take a shot while in front of the model.
  2. Have someone hold the projector so you can position the projection in interesting ways.
The photo on the extreme right uses a snoot to have a rim light (though it doesn't look like a rim light in my photo)

This spread was used in my portfolio/photo album requirement for our final exam. 

Studio flash shoot (Actual model shoot)

photography and layout by me. model: charles
I used a 1 studio flash (I think it was 600 watts, it was huge) in lowest power and placed a little far back. Behind the model (not directly behind) a snoot was placed to create a little bit of dimension. The shoot was themed Alice in the Wonderland/Indie-fairy-something, hence, the background and the outfit.

photography by me. model: charles
Another favorite shot. Charles is a cosplayer so she was a natural when it came to posing.

Studio flash shoot (Rehearsal)

photography and layout by me. model: adonna velez
Using a snoot, an external flash, and some colored gels (though we used colored CD cases) we had a very fun and colorful shoot. I wanted to do this kind of photo shoots because I really love colors in photos. The red creates a really dramatic effect.

To get this shot, I had one of my classmates hold the external flash above the model while holding a colored 'gel' in front of the flash (I believe it was a violet/purple color, which you can see clearly in the photo on the left side. Another person was holding a red colored 'gel' in front of the snoot to get that red color.

Saturday, August 29, 2015

Light: Zones, Reciprocals

At this point, I already know that you can control the light using the exposure triangle: Aperture, ISO, and Shutter Speed. This week, we went to a more advanced lesson about controlling light. It was quite advanced actually, thank God I didn't get lost.

WE learned about the middle gray, which is what the camera does to a white or black space. It never really shows white, and/or black, instead in translates it to a middle gray.

Another thing we tackled is the different metering the camera uses. These are (based on my camera which is a Canon 1200D) Evaluative metering -- the default setting, this makes the camera evaluate the whole composition, -- Partial metering, and Center-weighted average.

We also discussed the Zone System, popularized by Ansel Adams. This zones also correlates to the exposure 'meter' on the camera. With '0' as the Zone V(5) and is the middle ground, '-3' as Zone II(2) which is PURE-BLACK (underexposed), and '+3' as Zone VIII(8) or PURE-WHITE (overexposed).

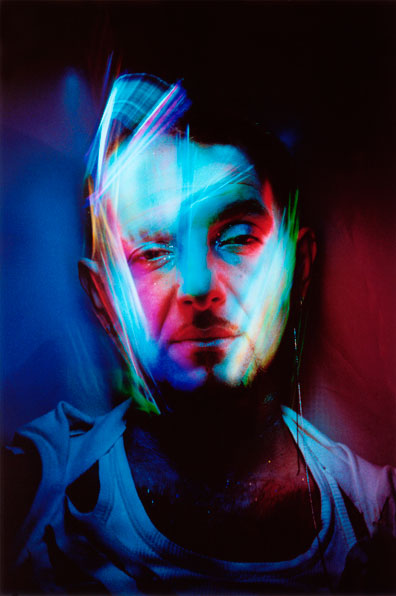
The following photos are taken as an example to show reciprocals, which is, different settings (relative to your base setting), but same exposure. 

Disclaimer: These photos are NOT similar EXCEPT for their exposure.

BASE SETTING: Shutter Speed 1/500, Aperture 4.0, ISO 200

SAME APERTURE: (RELATIVE TO BASE SETTING) Moved Shutter Speed 1 stop darker (1 stop darker=doubled the base shutter speed): Current SS 1/1000, to balance this, I moved the ISO 1 stop brighter: Current ISO ISO-400

SAME ISO: (RELATIVE TO BASE SETTING) Moved the Shutter Speed 1 stop brighter (1 stop brighter=divided the shutter speed to two): Current SS 1/250, to balance this, I moved the Aperture 1 stop darker (so from f/4.0, I moved 1/3 stop(4.5) to 2/3 stop(5.0) to f/5.6) [THIS MEANS I MOVED TWO SPOTS TO GET TO 1 STOP]): Current Aperture f/5.6

SAME SHUTTER SPEED: (RELATIVE TO BASE SETTING) I moved the Aperture 1 stop darker: Current Aperture f/5.6, and to balance this, I moved the ISO 1 stop brighter: Current ISO ISO-400

Monday, July 27, 2015

Alphabet Photography

ALPHABET PHOTOGRAPHY. Photo of photos on a photo

WITHOUT the light, the photoshop, the set, the costumes, and all the other technicalities, what would a photo be? What can it make interesting?


I think, the sole importance of this activity is to train our eyes on finding the perfect composition. To find that angle that makes a photo amazing. Amidst all the clutter, and all the shapes and lines and curves, we struggled to find the perfect angle to reveal a letter which would complete our alphabet.

Without all the fanfare, just a certain angle can make a simple, uninteresting shot to a 'money shot.' It takes one good eye to find this angle.


Lighting Patterns


SPLIT LIGHTING. Model: Lenore Quibael

THERE ARE several lighting patterns that you can use to create an interesting photograph. Here are the 4 basic light patterns that are essential for every photographer to know.

1. SPLIT LIGHTING

Split Lighting -- as the name suggests -- splits the face in halves, one in the light and one in the shadow. This creates a really dramatic effect. This is applicable, but not exclusively, to men. To achieve such look, a light is placed 90 degrees to the left or right of the subject.

Other variations include SHORT and BROAD lighting.

2. LOOP LIGHTING

In Loop lighting, a shadow of the nose is cast on the subjects' cheek.

3. BUTTERFLY/GLAMOUR

BUTTERFLY LIGHTING. Model: Angelica Fandialan
Butterfly lighting is achieved by placing the light directly above and behind the camera. This creates a 'butterfly' shadow under the nose. It also creates shadows under the cheeks. This is often used for glamour shots.

4. REMBRANDT LIGHTING

Rembrandt Lighting is characterized by one thing: a triangle on the subject's cheek. This was taken from Rembrandt's various portraits, which displays the same pattern. This lighting pattern often creates a dignified look. It is also applicable for subjects with high cheekbones. 

REMBRANDT.


more about lighting patterns here 

Light Painting


POWER. Model: Angelica Fandialan
Original concept I wanted to try. Photo by Patrick Rochon

LIGHT PAINTING is done by exposing your image longer to capture the path of light you are using to draw. This is easier to do in pitch black situations/places (I mean, duh, but we really struggled with our shoot because it was afternoon so we had to find the deepest, darkest, most evil -- just kidding -- place in UPLB (where we shot). We ended up shooting in this basement area. The place looks abandoned except that, there was a choir practice happening, which made it, well, sinister.)

The photo above was shot with a Canon EOS 1000D. ISO was set to ISO 100; aperture to f/29, and; exposure time was 30 seconds. I played with a lot of concepts. The first photos we shot was in an empty space, but it had windows so it was very tricky. Another concept I wanted to try was to use different colors of light to paint, unfortunately, I wasn't able to bring a lot of colored lights. Sadly, it didn't really work for me, so I asked a friend to model for me. I used a white light and a yellow light. The yellow light proved to be a great addition because it gave a little color to the skin. I also used the yellow light to create an 'energy ball'. The white light was mainly used to light the background and my model.

It was really challenging to capture the photo above because the model had to stay in that position for 30 seconds, which may seem to be a short time, but it seemed forever. Kudos to her, she made it look so effortless.

What we did above is just one idea to try when doing light painting. There are a lot of examples you can find in the internet, here are some interesting ones:

From http://www.q8ieng.com/


Photo by Samantha Wild